Google SAML SSO for Jitbit Helpdesk - Setup Guide
Connecting Google Workspace to Jitbit Helpdesk via SAML 2.0 lets your team sign in with their existing Google accounts - no separate passwords, no manual account creation. Once configured, users who are already signed into Google get seamless single sign-on into your helpdesk without entering any credentials.
This guide walks you through the entire Google SAML setup in about ten minutes. You will configure a custom SAML app in the Google Admin console, then paste two values into Jitbit's admin panel. That is all it takes.
Prerequisites for Google SAML Integration
Before you start, make sure you have:
- Google Workspace admin access - you need to log in to the Google Admin console to create a SAML app.
- Jitbit Helpdesk admin access - you will paste the SAML endpoint and certificate into Jitbit's admin panel.
- Your Jitbit helpdesk URL (e.g.,
https://yourcompany.jitbit.com/helpdesk/).
Step 1: Open the Google Admin Console SAML Settings
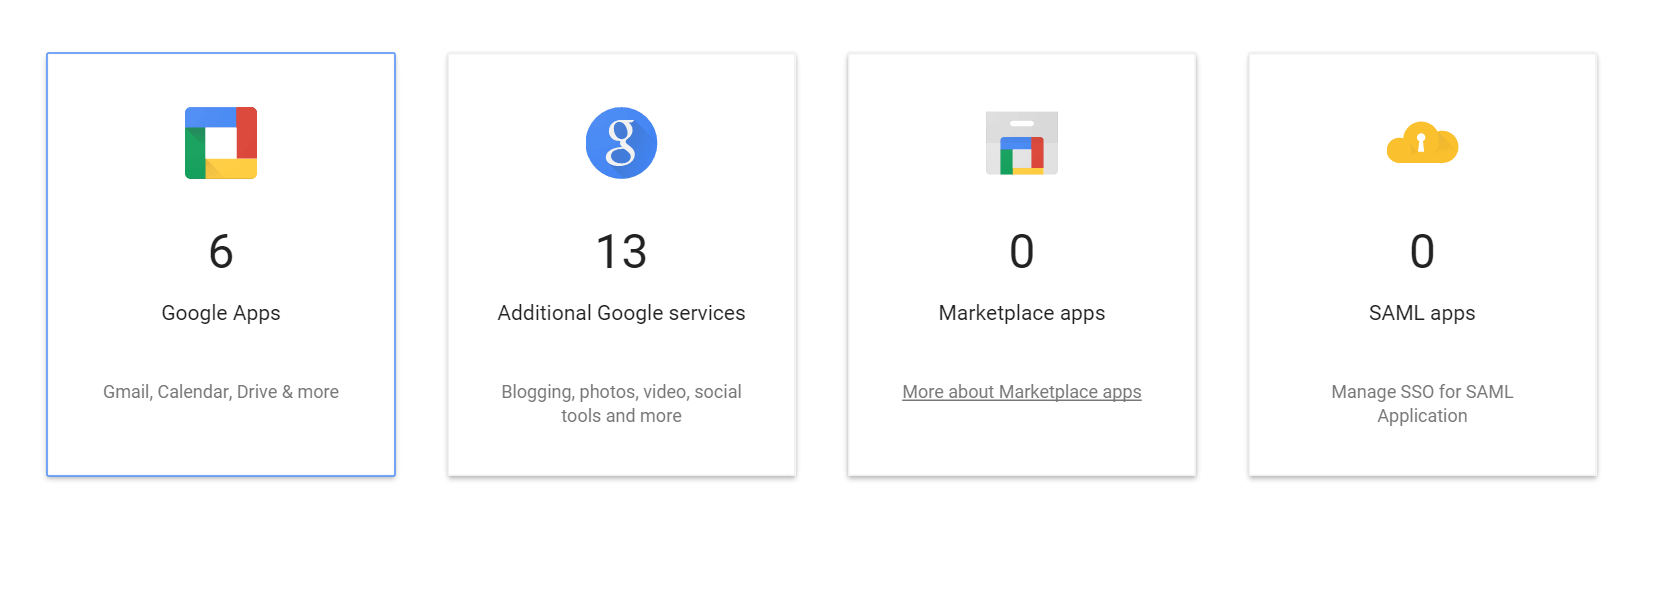
Sign in to the Google Admin console, then click "More Controls" followed by "Apps" at the bottom of the dashboard.
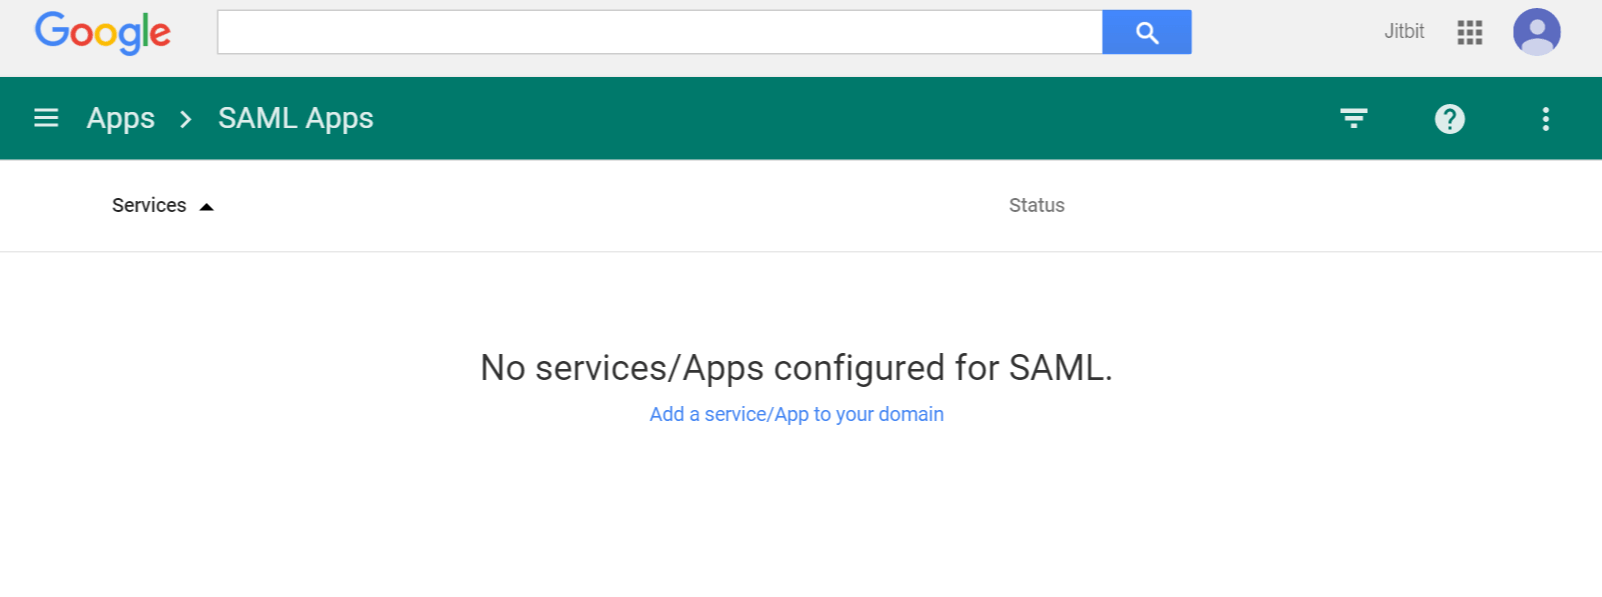
Then click "SAML Apps" to open the SAML application list.
Step 2: Add a New Custom SAML App
Click "Add app to your domain".
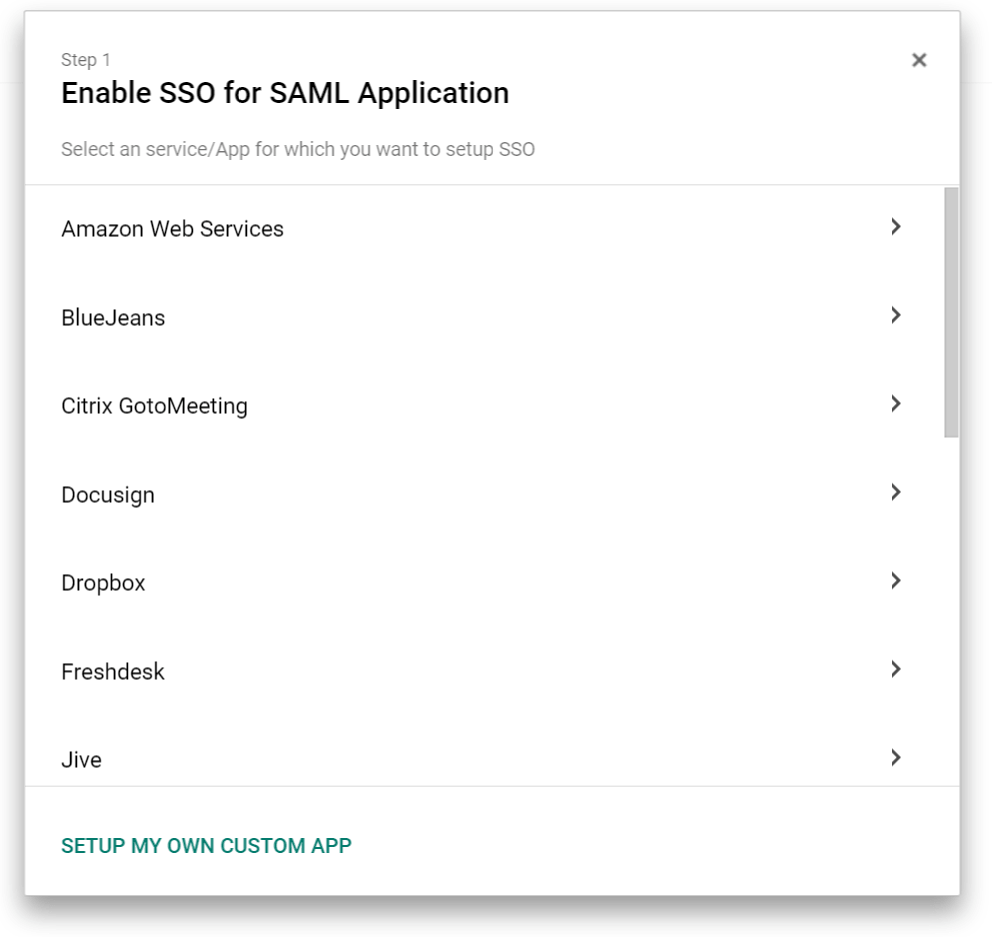
On the next screen, click "Set up my own custom app". This tells Google you are connecting a third-party application (Jitbit Helpdesk) rather than one from Google's pre-built catalog.
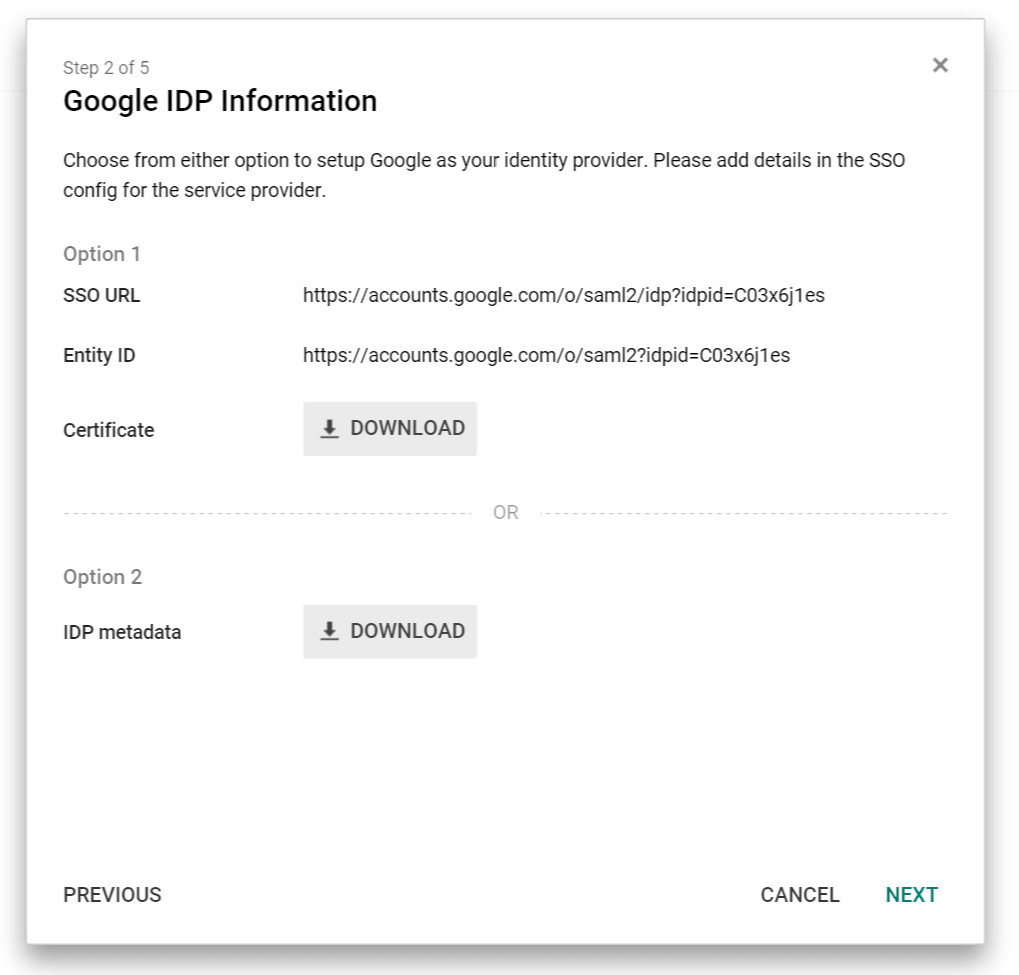
Step 3: Copy the SSO URL and Download the Certificate
This is the most important screen. You need two things from it:
- Copy the SSO URL - you will paste this into Jitbit's admin panel in the final step.
- Download the certificate - this is the X.509 certificate that Jitbit uses to verify the SAML response from Google.
Save both of these somewhere accessible, then click "Next".
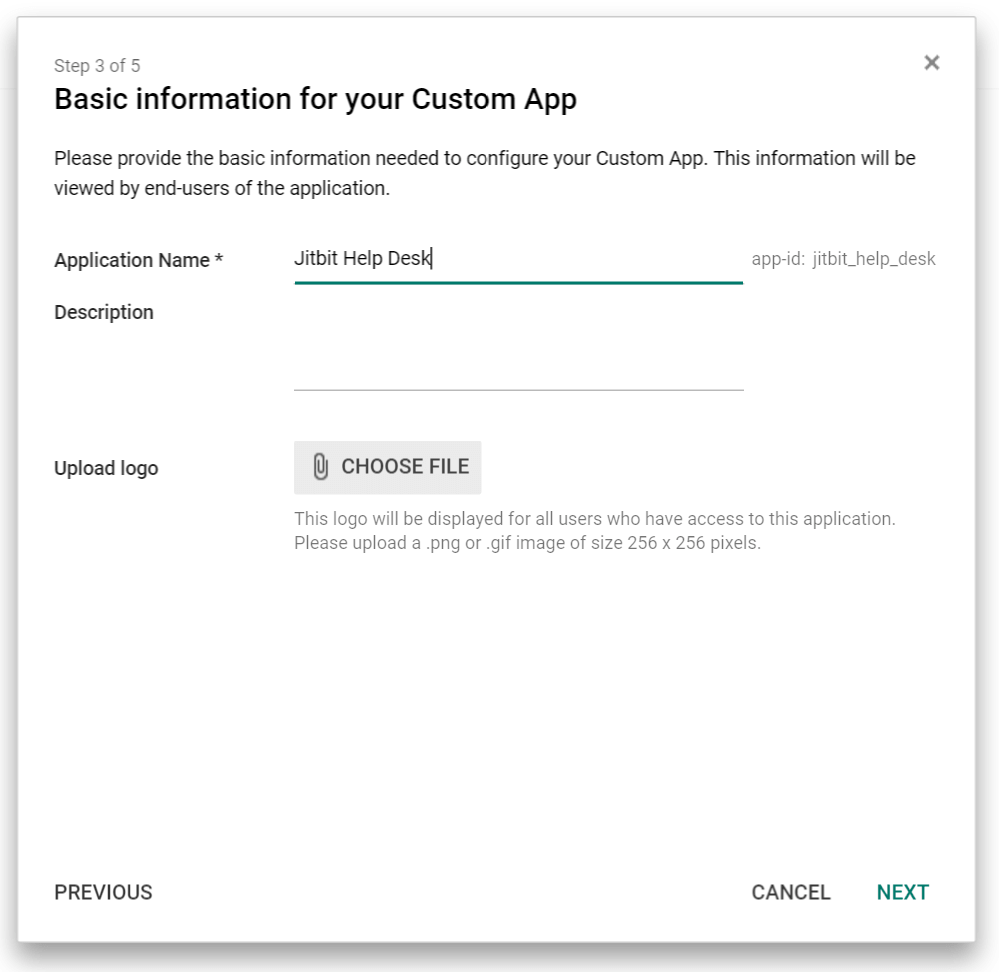
Step 4: Name the Application
Type "Jitbit Helpdesk" into the name field (or any name your team will recognize, such as "IT Helpdesk" or "Support Portal").
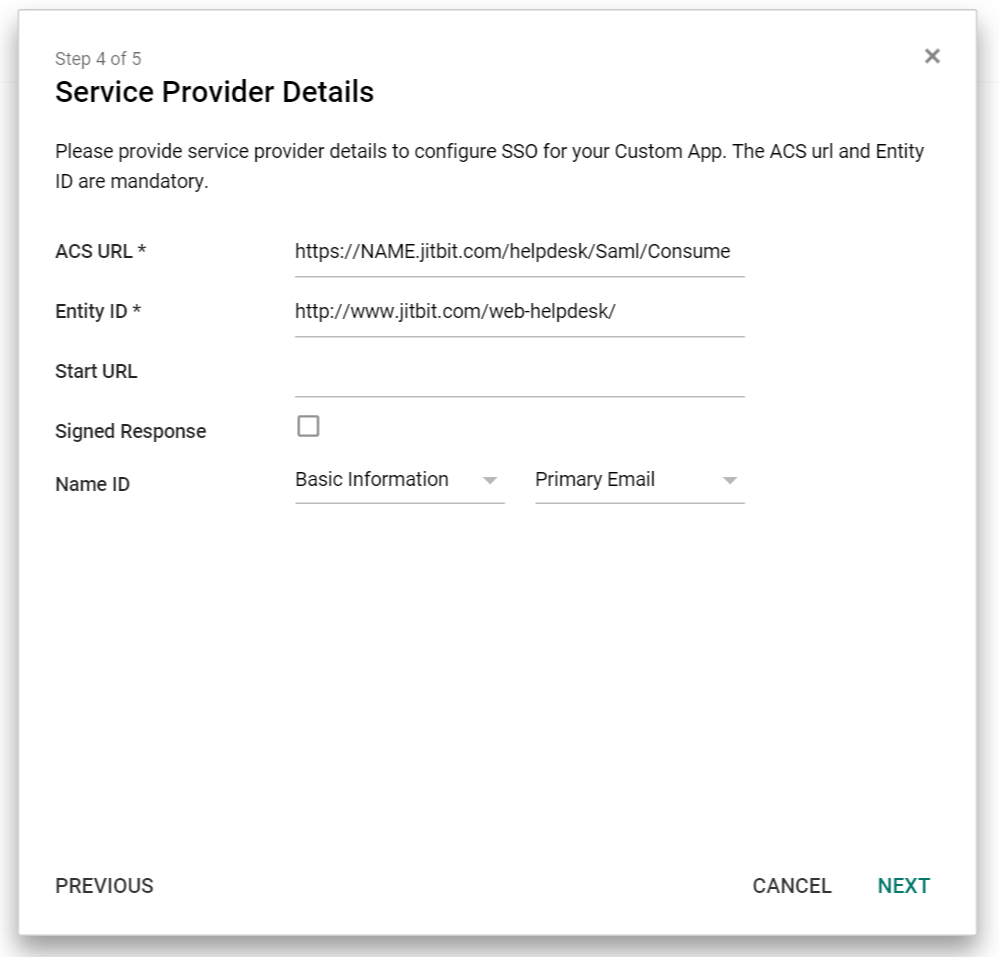
Step 5: Configure the SAML Service Provider Details
Fill in the following fields exactly as shown:
- ACS URL -
[HELPDESK_URL]/Saml/Consume(for example:https://yourcompany.jitbit.com/helpdesk/Saml/Consume) - Entity ID -
http://www.jitbit.com/web-helpdesk/
Make sure the Entity ID matches exactly, including the trailing slash. Here is what the completed screen looks like:
Step 6: Paste the SSO URL and Certificate into Jitbit
Now switch to your Jitbit Helpdesk admin panel. Navigate to Administration → General Settings → SAML and enter the two values you saved from Step 3:
- Login URL - paste the SSO URL you copied from Google.
- Certificate - open the downloaded certificate file in any plain-text editor (Notepad, TextEdit, VS Code), copy the entire contents, and paste it into the certificate field.
Save the settings. Your Google SAML single sign-on integration is now active.
Testing Your Google SAML Configuration
Open a new browser window (or an incognito window), navigate to your helpdesk URL, and click "Sign in with SAML". If you are already logged into your Google Workspace account, you should be redirected into the helpdesk automatically - no password prompt.
If the sign-in fails, double-check these common issues:
- The ACS URL must match your exact helpdesk address, including
/Saml/Consumeat the end. - The Entity ID must be
http://www.jitbit.com/web-helpdesk/- do not change this value. - The certificate must be pasted in full, including the
-----BEGIN CERTIFICATE-----and-----END CERTIFICATE-----lines.
What Happens When Users Sign In via Google SAML
When a user signs in through Google SAML for the first time, Jitbit automatically creates a helpdesk account using their Google email address and display name. There is no need to manually create user accounts - new users are provisioned on first login.
For fully automated user provisioning and deprovisioning (automatically removing access when someone leaves your organization), Jitbit also supports the SCIM protocol with Google Workspace.
Google SAML vs. "Sign in with Google" - Which Should You Use?
Jitbit offers two ways to let users sign in with Google accounts:
- "Sign in with Google" (OAuth) - zero configuration. Enable it with a single checkbox in the admin panel. Best for small teams that want the simplest possible setup.
- Google SAML 2.0 - the method described in this guide. Best for organizations that need centralized identity management from the Google Admin console, enforced MFA policies, or compliance with enterprise SSO requirements.
If you are unsure, start with "Sign in with Google" - you can always upgrade to SAML later without disrupting existing users. Read more about all available options in the full SSO documentation.
See also: helpdesk single sign-on (SAML and beyond) | help desk software for Google Workspace | Active Directory authentication
Features
9 reasons to choose Hosted Zendesk vs. Jitbit Compare alternatives What is SaaS Active Directory Authentication Cloud Help Desk Free Email account and more Authentication API Online Ticketing System Benefits Single Sign On SLA and Help Desk Automation Helpdesk API Helpdesk for your industryResources
Customer reviews User guide FAQ What's new Version history Free trial Pricing